16 July 2024

Ninja in a GFX 100II workflow

Hybrid photographer turned filmmaker Jim Marks talks through the impact Atomos monitor-recorders have had on his life as a solo operator, and explains how he’s customised his Fujifilm GFX 100 II to deliver a finely tuned performance that’s perfectly in line with his chosen way of working.

By Atomos

Filming fashions change but one thing is constant: the march of the mirrorless cameras continues to grow with their adoption across the industry. From feature films such as The Creator through to stadium-based live sports and events, the cameras we’re all using are getting smaller and faster as they push the boundaries with larger sensors in bodies that appear to be ever-shrinking. Hand in hand these advances create new challenges for the working operator. As the cameras get smaller, having less real estate on the camera body can present fresh challenges. How, for example, can you monitor and rig these miniaturised handheld devices while still maintaining the highest possible recording quality in your workflow?

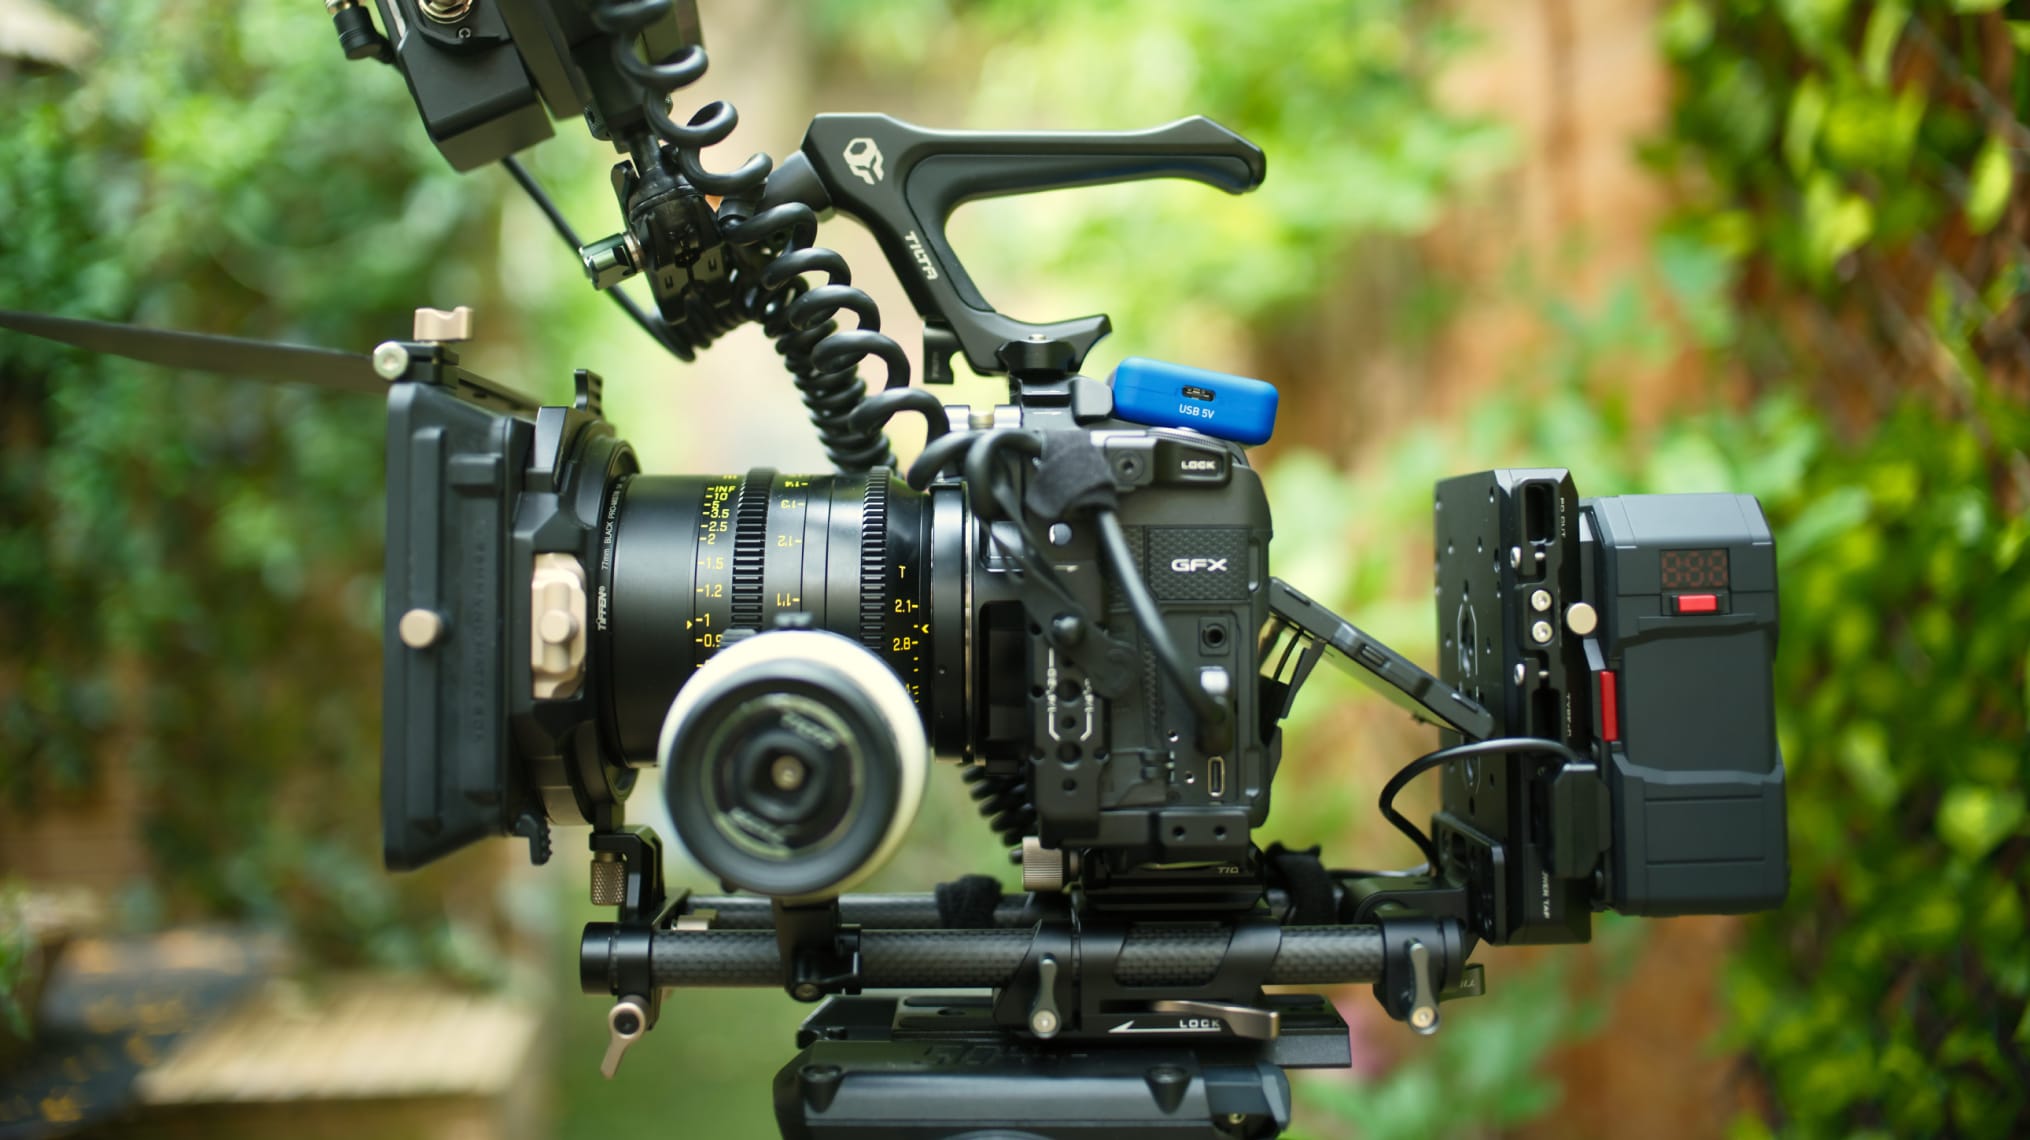
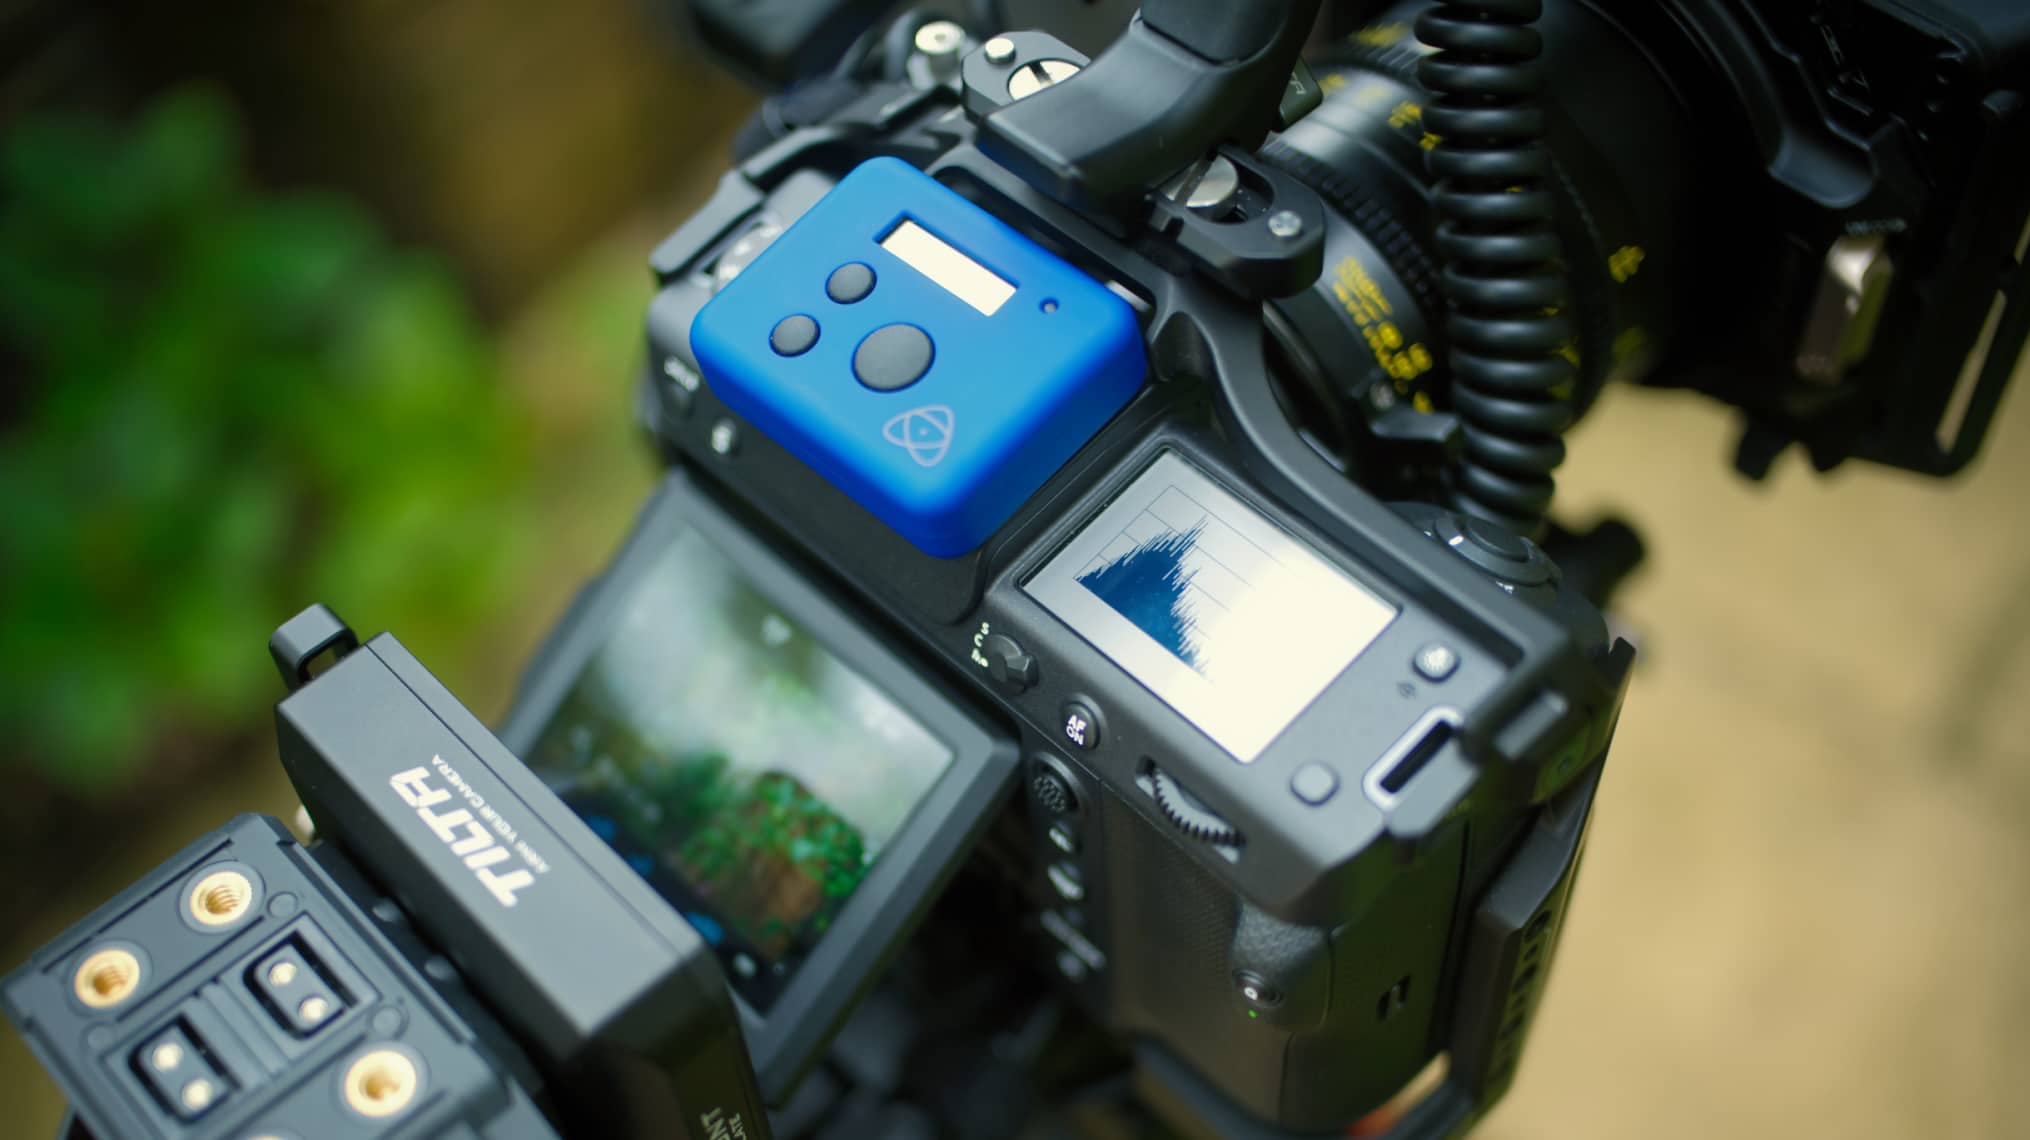
As a working filmmaker who works regularly with the latest generation of hybrid mirrorless models, the monitor-recorder has long been a staple of my everyday workflow. For the last few months I’ve been developing a small, Tilta-based Fujifilm GFX 100 II rig, which marries the magic of this camera’s incredibly light form factor and awesomely powerful medium format sensor with the versatility of the Atomos Ninja recorder monitor, giving me a set-up where I can seamlessly capture ProRes RAW HQ.

Recently I was given the opportunity to offer feedback on the latest Atomos firmware 11.06 update, which I’m delighted to say has led to the introduction of a proper F-Log 2 monitoring workflow. In practical terms this means that, with the use of the rear external SDI module* on my Ninja V+ monitor, I can output a Rec.709 feed in an F-Log2 colour space (BT.2020 is also available).

This facility then allows my director or client to see the RAW footage using an F-Log2 show LUT of my choice. It’s all helping the cause of F-Log2 being accepted, whether that be in FCPX or the beta version of DaVinci Resolve 19. Time and again I see F-Log2-enabled Fujifilm XH2s and GFX 100 II’s being used as B and C cameras on larger ARRI based productions, since it’s such an easy and natural partner to this established player. Of course, the recording hardware is but one element of the overall picture, and the operating software likewise plays a vital role in providing the features and reliability we all need when filming.

Features and reliability

Atomos’ latest Onion Skin UI is a big improvement on previous iterations, with a cleaner look and simplified controls. I personally like being able to add my guides and waveform with the option to keep it small and to the side, with the opacity increased and brightness knocked back so it’s there but not distracting. Having access to that level of customisation is really important.

In the same way as your camera might feature custom buttons you can utilise for your favoured shortcuts, everyone has their personal viewing preferences, so it’s great we have a menu and screen options that allow users to customise their device.
On the Ninja itself you can have an unbaked look, Rec.709, or add a show LUT, which tends to be my approach. I always securely erase my drives on the unit, and a 500GB gives you 27 minutes in ProRes HQ at 4K 24 fps, while a 1GB will give you 54 minutes, again my choice. I set the waveform to be small bottom left, and have peaking, zebras and false colour to assist my exposure choices.

Once you’ve worked with any screen for a while you get an instinctive feel for where things should be. On the guides front I can set safe areas and composition frames, and I tend to use the 2.35 crop guide a lot. I even sometimes use the frame grab button if I want to just capture what a scene might look like. For anamorphic glass I definitely appreciate the desqueeze options, and they’re all covered, from 1.25, 1.33, 1.5. 1.65, 1.79, 1.8 and 2 times. In the future it would be great to create custom ones.

Using timecode, I would jam the GFX 100 II with an UltraSync Blue box and its iPhone app, and this then would carry over into the recorder over HDMI. If you have the black UltraSync One with its hard-wired mini port you can also mix this camera with others on Tentacles, or even use an external audio recorder as your master clock. The two ports people most often overlook are the headphone and remote inputs. The former is crucial to monitor if your audio is going directly into the Ninja as your master copy, while the latter is actually really useful if the camera is stuck in a hard-to-reach place, as you can trigger your recording by using a long cable.

Building a rig

Centred on my Fujifilm GFX 100 II, I’ve created a camera build that tries to strike that delicate balance of keeping weight down yet being ready to go straight out of the bag. I use a Tilta cage system with a small top handle and a 15mm rod support below. I have actually now downsized the cage connector to the basic Tilta Arca one, since it allows the camera to be hot swapped off the rig quickly.

At the front of the rig I’m running a Tilta Mirage matt box with variable or fixed ND, and Pro Mist filters. I love that I can roll the ND on the top easily if I’m having to adjust levels on the fly. It has a small support to connect it to the bars for stability and, crucially, it’s not too wide, so it fits in a carry bag while fully assembled. On the rear of the set-up, I have one of the latest Tilta V lock power plates. This powers the camera via a dummy battery-to-D-Tap cable, while the other D-Tap runs to the power adapter mounted on the SDI accessory on the Ninja. I’ve chosen to do this to get as much weight off the Atomos as possible, since it tends to be set up high. This helps the overall balance and allows me to power the entire design from one PAG battery.

“The two ports people overlook are the headphone and remote sockets. The former is crucial to monitor audio, and the latter if your camera is in a hard-to-reach place, since a cable can then trigger the recording.”

At the front of the rig I’m running a Tilta Mirage matt box with variable or fixed ND, and Pro Mist filters. I love that I can roll the ND on the top easily if I’m having to adjust levels on the fly. It has a small support to connect it to the bars for stability and, crucially, it’s not too wide, so it fits in a carry bag while fully assembled. On the rear of the set-up, I have one of the latest Tilta V lock power plates. This powers the camera via a dummy battery-to-D-Tap cable, while the other D-Tap runs to the power adapter mounted on the SDI accessory on the Ninja. I’ve chosen to do this to get as much weight off the Atomos as possible, since it tends to be set up high. This helps the overall balance and allows me to power the entire design from one PAG battery.

In addition, the rear power unit has a couple of USB-C ports to help power other accessories, such as, for example, a Nucleus Nano follow focus. One of the trends I only see accelerating is the widespread adoption of the USB-C socket for data and power. I’m really pleased to see how all these components are gelling together to create a small, but punchy cinematic powerhouse.

As for the future, well, older readers might possibly remember a product called the Ninja Star. I’d personally love to see an updated version of that: smaller than a packet of cigarettes, passive cooling, CFast type B, with lockable USB-C, SDI and HDMI inputs. Go on Atomos, you know you want to!

*The SDI module is no longer available and has been superseded by the Atomos Connect module.

Keep Exploring

Case Study

Shooting anamorphic with Tito

Case Study

The Creator: shooting a Hollywood blockbuster in challenging locations

Creator Content

LA Clippers: producing social media with Ninja Ultra